I repaired my 1989 A2000 back in 2006 for a bad battery leakage. I thought I cleaned the PCB properly with a special battery spill cleaning formula but some remained on the CPU socket.
I had a black/green/yellow... screen at boot-up since a week or two. After a general cleaning with a scilicone based contact cleaner, I made it work intermittantly. I then isolated the issue to the CPU.
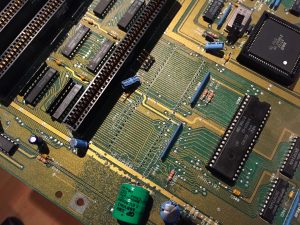
Seeing the socket leads being very corroded, I decided to replace it. Some of these 64 pin sockets are still available from Digikey at a reasonnable price.
Unsoldering this thing was quite a challenge since the lead used back then was not RoHS at all! :eek:
I managed to remove it bit by bit by cutting it in 4 parts. I felt like a dentist removing a wisdom tooth!
Well, after cleansing and all, tada!!
Soldering back the new machined socket was easy as 1-2-3.
It worked right-a-way!
Ok now back to my RGB to YPbPr circuit...

http://www.retronicdesign.com/en/new-product-in-developpement-amiga-rgb-to-ypbpr-components-video-converter/
Cheers!
I want you to use vinger to clean the hole area as bast you can and then clean it with a lot of water and see if it did it's job. You keep doing this intell you don't see not a thing in where the pins are. And then you can report back to everyone of the job you did. Just do remember to keep no battery in the area no more and put it out by the hard drive light with wires to the area of the battery area. I am in the sacc.org in sacramento California amiga computer club.
