|
|
| Cleaning an A1200 keyboard - Reassembly | ||
 |
||
| Previous Image | Next Image | ||
|
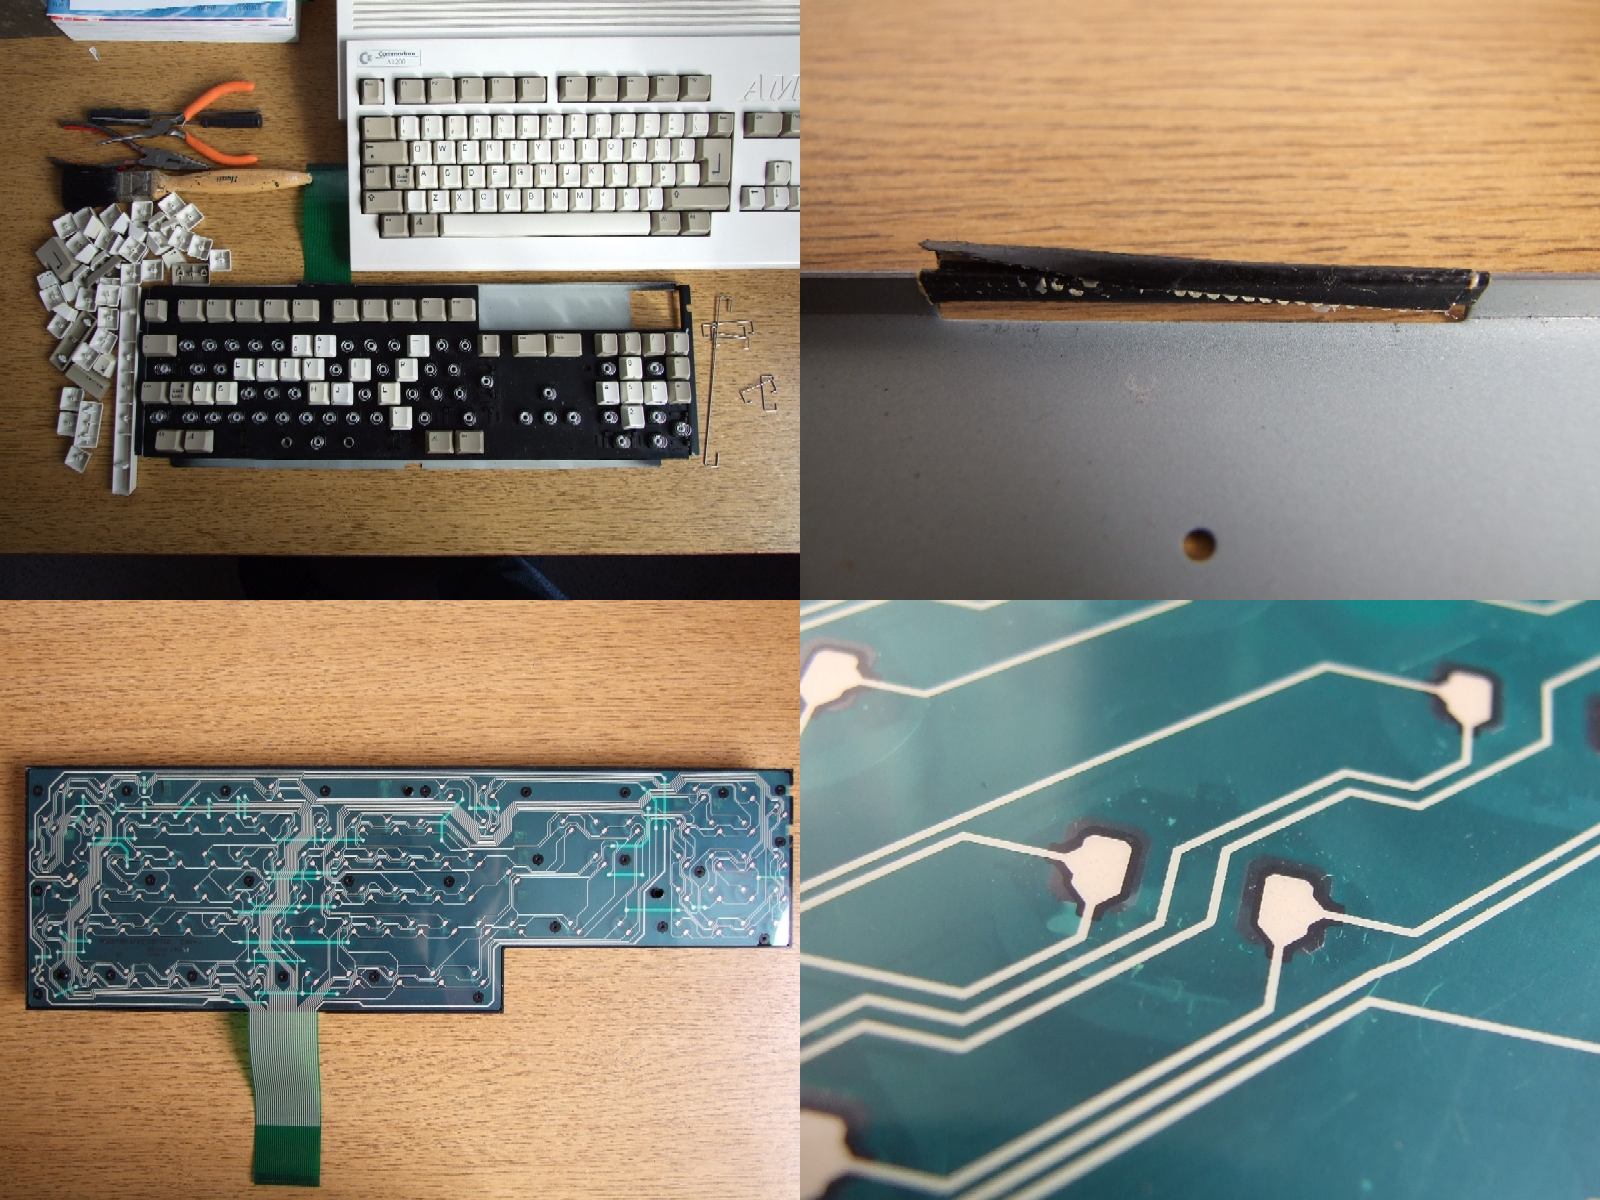
Description: Reassembling an A1200 keyboard after cleaning (See my other photos...). Top left photo: Part way through reassembly, with the springs already laid out on the keyboard. Top right photo: Something I thought people ought to be aware of. The tape's wrapped around one of the edges of the keyboard metalwork, where the flexi-track ribbon enters the keyboard in order to prevent chafing on the sharp edges. I haven't added this tape - Either it’s original, or the previous user's added it. Bottom left photo: The internals of the A1200 keyboard. Bottom right photo: How a key works. Most PC keyboards tend to have two plastic layers, separated by a holed layer. On a PC, pressing a key causes one layer to push through the hole onto the other layer, making a contact. It would appear that A1200 keyboards have just one layer, with conductive pads on the bottom of each key. Hodgkinson. Picture Stats: Views: 2101 Filesize: 281.36kB Height: 768 Width: 1024 Posted by: Hodgkinson at September 15, 2007, 02:42:26 PM Image Linking Codes
|
||
| 0 Members and 1 Guest are viewing this picture. |
| Hodgkinson Posts:1080 | April 18, 2008, 06:51:12 PM Ah ha. Thanks! Hodgkinson. |
| rkauer Posts:3263 | April 18, 2008, 06:41:15 PM For the top right pic: That tape is original. |